Since getting outdoor lights evenly spaced—with all bulbs facing (more or less) in the same direction—during a Maine autumn is challenging to say the least, we thought we’d share some of our key designer, Anna Leavitt’s favorite tips.
1. Start small—choose key focal points, and begin by lighting just two or three items. Step back and see how that looks before adding new displays. Designer Anna Leavitt says, “The more intimate and secluded an area, try to keep it limited to only a few colors to avoid overwhelming the senses.”
2. Protect your trees— Avoid compacting the soil around trees with ladders and heavy boots, and avoid wrapping trunks and branches too tightly. If you damage your tree, especially in the winter, it’s much more susceptible to disease. Avoid nails, staples, screws or hooks. If your lights need securing, try electrical tape or clips like parapet clips instead, which are especially designed to mount holiday lights.
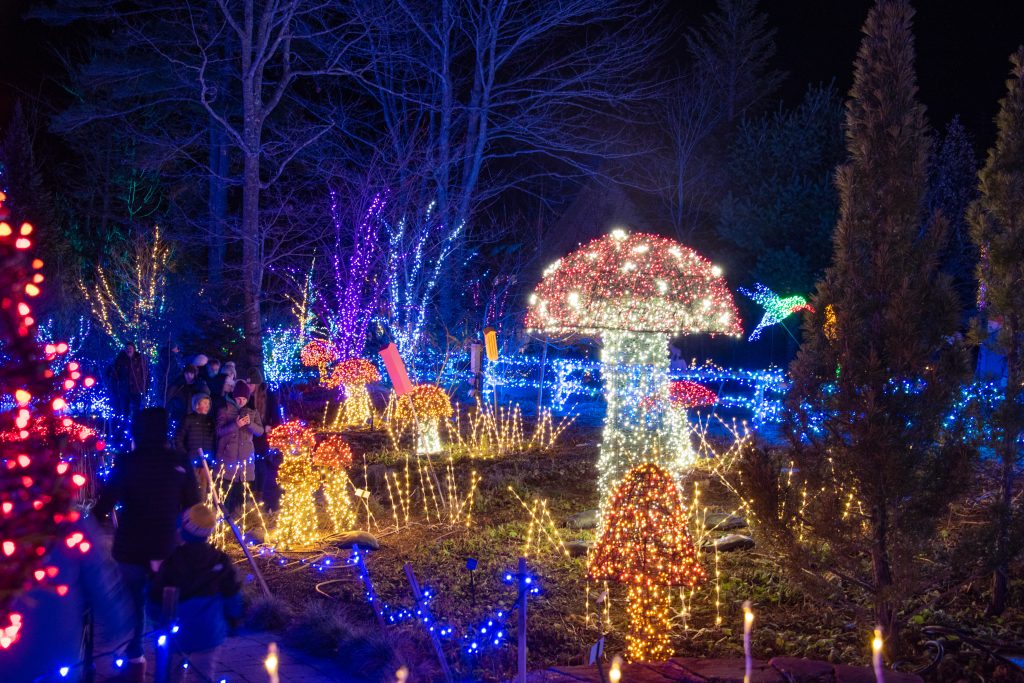
3. “Think about each area separately,” Leavitt continues. “I choose a different color theme for each area and within each there are certain ways to think about color. For example, the Children’s Garden is a little crazy and has lots of colors, whereas the Woodland Garden is kept to two or three main cohesive colors to create a more intimate space. Last year we tried red, orange, and yellow with accents of other colors. This year we’re going for blue, aqua, and purple.”
4. Imagine what you can see when standing in different spots in your yard. “In the winter with no trees on the leaves, and also at night with bright LEDs, you can see A LOT and FAR. The colors within a garden not only have to look good together, but they have to blend with the surrounding gardens, and each garden hopefully transitions nicely into the next. Think about the ground plane, foreground and background, height. Add dimension—think about both the horizontal and the vertical and consider ground covers like stake lighting or outlining paths and driveways.”
5. Avoid the temptation of overload—not only can you overload your circuits (unless, of course, you use LED lights), but you can overload your senses. Start small (see item 1) and go from there. Maybe even sleep on your display before adding to it. “And be sure to check it out after dark,” Leavitt advises. “That’s the best way to see if you have holes in your design.”
6. Think inside the box—besides trees, there are oodles of lighting options for the gardener. Have a window box? You can coil light strands on top of the soil, then plant small, hardy shrubs or insert branches (paint them white, gold, or silver for extra holiday oomph). In addition to window boxes, you can try the same trick with planters on your property. Cone trees—either store-bought or homemade—are also a good alternative to wrapping living trees and shrubs. Or if you have a birdbath in your yard, you can pile battery-lit globes or spheres in and around it for a variety of visuals. Alternatively, try twisting rope lighting into various shapes and hanging them from trees or your porch, creating snowflake-like shapes. Disguise the cord with ribbon, if you’d like.
7. When choosing trees to illuminate, deciduous trees are the easiest choice, since they’re easily accessible and the trunks and branches offer a striking silhouette. Opt for interesting trees, but also be sure to choose trees that are strong enough to withstand the weight of the lights in addition to the harsh weather conditions of winter. It might be needless to say, but don’t choose trees that come in contact with power lines.
8. Remember your budget—think about the circumference of a tree and how many times you’d need to wrap it. Plan and budget for every tree, shrub, or stone wall you want to wrap or drape.
9. Other materials—you need more than lights to create a magical (and safe) holiday display. You’ll want a sturdy ladder (and someone to spot you), gloves, lights, and clips (remember a staple gun and/or nails can damage a trunk). If you’re wrapping a tree with rugged bark, you probably won’t need anything to fasten the lights to the tree.
10. When wrapping, start from the base, and make sure it’s the visible base. That is, if your tree’s base is hidden by shrubs or stonework, begin at the visible line. Then, start wrapping and space your lines evenly. One easy way to ensure even spacing is to use four fingers between strands as you wrap. When wrapping branches, leave twice that much space so when you double-back, the spacing will stay consistent.
11. It probably could go without saying, but we’ll say it anyway—test your lights and the connections between your strands of lights.
12. Keep track: “I keep track of everything in an Excel spreadsheet, and it’s been updated over the years, so we know how many strands go on each tree or structure and we can keep track of what colors have been done in the past. I also note whether it can be done from the ground, a short ladder or a tall one, or the lift so that I know who—and how many—I need for each task,” Leavitt says.